Archive

Furniture

We want to cook food.  In order to do that we need a stove.  We looked at a number options, but ultimately we decided to “imbed” our portable Coleman two burner stove into the kitchen countertop.  This stove runs off those small green propane cylinders, so we thought about buying a small (maybe 1 gallon) propane tank and hooking it up instead of changing out propane all the time.  But because we had no place to put it, and we typically don’t use a lot of propane on our camping trips, we decided to stick with those small green cylinders.  They are available everywhere, so it won’t be a problem finding refills. 

DSC_5927

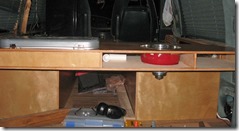
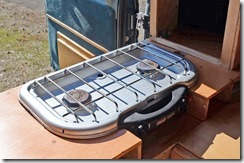
We cut an inset into the counter and bolted the stove to the countertop to keep it from falling out.  There is a good friction fit to the countertop, but we wanted a little more insurance in case of the van tipping over.  We also drilled out the rivets that hold the hinge on, so we can take off the top and cook from either outside or inside the van. 
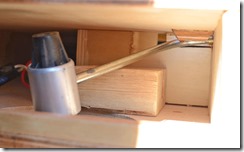
DSC_5925These stoves use a stem about 5 inches long to connect the stove to the propane tank, which will typically sit on the table next to the stove.  This wasn’t an option for us.  Our original plan was to orient this stem such that the propane tank would hang bellow the counter.  But when we installed the hot water tank we realized there was not enough room.   In this picture you can see the stem inside the counter top, with the tank connection on the left, sticking out a hole in the bottom of the counter.

DSC_5929Fortunately we found a hose that has the portable/disposable propane cylinder connections on either end.   It is a Mr. Heater / Enerco model# F273710.  The hose has swivel connections on either end, so the entire hose does not have to be turned to remove a cylinder.  We routed the hose up the side of the van, so the propane cylinder is stored at the top of the van, in the cabinets above the kitchen, as you can see on the left.  It’s well out of the way and in a rear end collision there is no 1 gallon propane tank to get smashed. 
One of the main advantages of living in a van, beyond a robust and easy shelter from the weather (no setting up a tent), is sleeping on a nice comfortable surface. We considered air mattress for awhile, but fears of leaks and discomfort lead us and size issues made us to decide to go with a foam mattress. Then we looked at making our own out of bulk memory foam, like our bed is in our house. We also thought about buying an off-the-shelf futon like mattress(es). Both of these options had some issues as well (i.e., could either of us sew a good enough cover for bulk foam, pre-made beds were all the wrong size and expensive).

DSC_5223In the end Em found a great place in Knoxville, Brothers Bedding, that will make custom mattresses in any shape and size and material. So we drove the van over to their shop, showed them our idea of how to have the bed, and worked out the perfect mattress system for us. They really did a bang-up job with it, and it seems like it will be quite comfy (haven’t slept on it yet). They finished it up for us in less than a week.

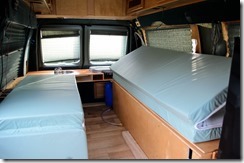
The mattress is split up in two pieces.  One piece is the size of the passenger side bench plus a little extra flap to account for the folding extension of the bed over there.  The other part of the mattress folds in two and sits on top of the driver side when folded up.

They fill the space of the bed when it’s folded flat.  Which ends up to a size of about 67 in x 67 in.  A short but wide mattress. Jay’s feet stick over the end if he lies flat, but it’s no big deal.  Queen sized-sheets actually seem to fit pretty well because it is such a thin mattress. All the folds are “hamburger folds”, which means our bodies won’t be oriented with the fold when we lay down, and thus we won’t sink into a crack. This very similar to how the camper van was set up in New Zealand and it worked well.  If you notice in the photo below, the mattress makers used a waterproof fabric on the bottom of the mattress, so while it is set-up as cushions for the bench seat any spills/messes won’t be a big deal or soak our bed for later.

DSC_5224

From this photo we’ll have to have some strap to keep the one side folded flat during the day, or hang one piece down over the front edge.

Here is the bed in the New Zealand camper van, which partially inspired our mattress set up.

the campervan

At the back of the van, behind the beds and above the water tanks, we put in a kitchen counter.  It spans the entire width of the van.  On top of it is the sink and a Coleman two burner camp stove (we’ll post more on the stove choice later).  Both are inset into the top of the sink.  It’s again screwed to the van. 

IMG_1021IMG_1026


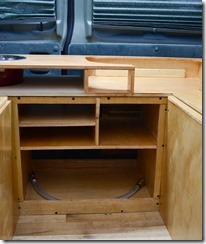
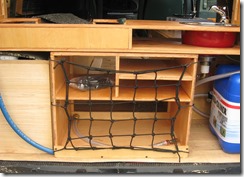
Underneath the counter, in the middle between the bed we put a small cabinet to put plates, pots, pans, or whatever else.  It will also support the kitchen counter as well.  Instead of doors we put a flexible cargo type net over the face.  This will allow pot handles to stick out if needed, thereby not requiring us to perfect fit everything within the envelope of the cabinet.


DSC_5862IMG_1565

Jay built a small cabinet to place the fridge on.  It’s between the bed cabinet and the drivers seat.  There are two small shelves underneath the fridge for more storage.  It’s screwed to the van like the rest of the cabinets.

DSC_5842

The fridge is also screwed to the top of the cabinet, so it won’t topple over whilst we’re driving around.  This fridge was chosen for it’s low power consumption, based purely on it’s Energy Star rating label, which shows typical power consumption for a fridge, and it’s cost.  It’s a Frigidaire 2.5 cu foot model. We had to get it ordered from a local appliance shop.

We decided on a compression cycle fridge because of it’s cooling capacity and overall efficiency.  There are other options, like thermo-electric (peltier) coolers and fridges.  They can cool on DC power alone, and thus don’t require a large power inverter, but they consume more power to accomplish the cooling because they are much less efficient at cooling than a compression cycle.  And they can only cool to around 50 degF less than the environment, so on really hot days our food might spoil. 

We hope to use this fridge to help save on food money, by allowing us to save any food we don’t eat.  This is opposite to our usual strategy of trying to save food but allowing it to spoil by soaking in a pool of cooler water, gross!  We also won’t have to buy ice, or dry ice to operate it. 

Though if we get into a really hot environment, we could buy a chunk of dry ice and stick it in the thing to aid in cooling process, and use less solar energy.  Though hopefully if it’s hot it’s sunny all day and thus we’ll generate more electricity.

IMG_0855

We installed the bed/storage cabinets in the van.  It was a simple matter of loading them into van, moving them into place, and screwing them to the floor and walls.  Simple cabinet corner (90 degree) brackets were used to screw the furniture to the floor (really the OSB base board).  Various galvanized brackets from Home Depot (like those you would use to build a deck) were used, along with sheet metal screws, to fasten the bed to the walls of the van.  With all said and done the cabinets were very secure, they haven’t move at all since being installed.


IMG_0847


As was the plan, the top of the passenger side is simply hinged like a blanket chest.  The top of the driver side is made of a two pieces hinged together.  This top is repositioned at night to lay flat, spanning the gap between the two cases:


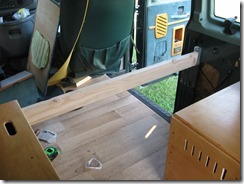
Because the driver side is longer than the passenger side, due to the side door, a small leaf was put on the side of the passenger side cabinet, to make up the extra difference.  A 2×4 is used to support that extra leaf, along with the part of the driver side top.  It spans from the driver side cabinet to a hanger bracket we installed in the side door.  It makes for a very sturdy arrangement.

IMG_0852  IMG_0849

The interior of the van is going to include multiple pieces of furniture made from wood. We opted to use half inch plywood pine (with a veneer top) for building this furniture because it provides a pretty good balance of affordability, strength, and durability.

1. We will have two bench seats which will provide seating in the back and convert into a bed, they also will have storage space underneath.

2. We will have a counter and storage shelves in the back of the van that will serve as our kitchen. This will include a place for a sink and stove as well.

3. We will have some cabinetry for storage underneath and above our refrigerator (which will be located behind the driver’s seat).

We are also keeping most of the upper storage areas that were already built into the van when we bought it. There is a nice bit of space where the TV and VCR used to be, as well as cubbies all along the sides of the upper interior.

Below are some photos of the bed/benches so far. We will add more to this post as we build more pieces of furniture! (If you are interested in getting more specifics on the build designs, feel free to ask questions in the comments, or to e-mail us at emjayvanblog@gmail.com.)

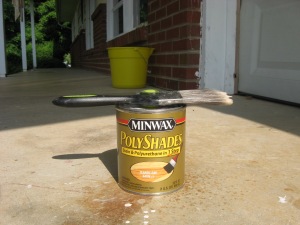
We used this wood stain and just followed the instructions on the can. It creates a water resistant smooth finish. Pretty straightforward to use.

We used this wood stain/polyurethane and just followed the instructions on the can. It creates a water resistant smooth finish. Pretty straightforward to use.

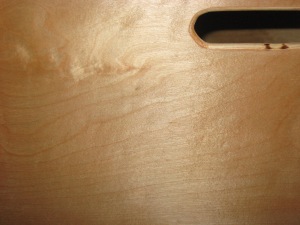
A close-up of the wood after staining it

A close-up of the wood after staining it

Bench with lid down

Interior shot of the storage space inside the bed box

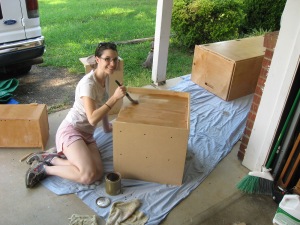
Em staining the shelf that will go underneath the fridge

Em staining the shelf that will go underneath the fridge

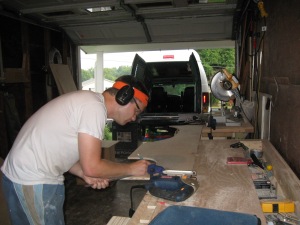
Jay measuring the semi-circle cuts in the furniture that allow for the wheel well and gas tank.

Jay measuring the semi-circle cuts in the driver-side furniture that allow for the wheel well and gas tank.

Jay cutting grooves so that the hinges will lay flush with the wood

Jay cutting grooves so that the hinges will lay flush with the wood

More sanding

Sanding